LPB Piso Wifi
LPB Piso Wifi is a system that provides affordable, coin-operated or voucher-based public WiFi hotspots, popularly used in the Philippines. It allows user to Insert Money, Pause Time and Vendo Owners can view Active users, monitor & limit Bandwidth usage, check User session time, Block devices and change various other settings at IP 10.0.0.1

For Piso Vendo Users:
How to Login to LPB Piso Wifi?
1. Connect to the WiFi Network
Open your phone or laptop’s WiFi settings and Look for the WiFi name (SSID), usually something like:
- LPB_PisoWiFi
- PisoNet_WiFI
Tap on it and connect. There is no password in Piso WiFi network.
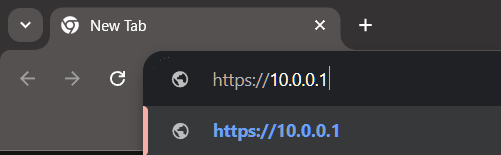
2. Open Your Browser
- Once connected, open Google Chrome, Firefox, or any browser.
- Type any website address like google.com and it will redirect you automatically to the LPB Piso WiFi portal.
- If it doesn’t autoredirect then manually go to the IP address 10.0.0.1.
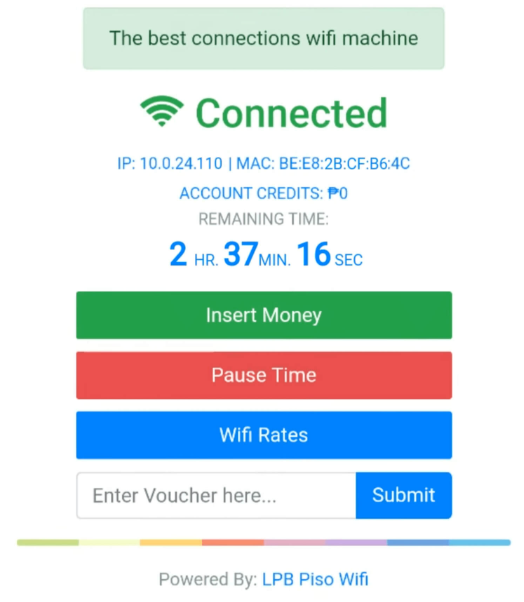
Now you will see the Piso WiFi login page and from there you have to Insert Coin or Insert a Voucher Code.
How to Insert Money in LPB Piso Wifi?
Follow the previous steps and Login to LPB Piso WiFi. After login follow the below steps:
- After logging in click on the Insert Money button in the Homepage
2. Look at the front side of the Piso WiFi machine and find the Coin slot.
3. Insert your coin(s) into the slot one at a time.
4. You will hear a “click” or beep confirming the coin was accepted.
5. Once you have inserted money, press the Done Paying button.
6. Then you will be connected to the Piso WiFi.
How to enter Voucher Code in LPB Piso Wifi?
Follow the previous steps and Login to LPB Piso WiFi. After login follow the below steps:
- After logging in find the “Enter Voucher Code” field in the Homepage.
- Enter the Voucher Code in that field.
- Click on Submit button and Redeem it.
How to Pause Time in LPB Piso Wifi?
LPB Piso WiFi systems one of the most useful options is the Pause Time feature. It lets users save internet time by pausing the time when they’re not browsing. Login to LPB Piso WiFi by following the previous steps. After login follow the below steps:
- In the Homepage find the Pause TIme button.
- Click the button, your Internet time will be paused.
- After that click Resume Time button to surf the Internet again.

For Piso Vendo Owners:
How to login to LPB Piso Wifi Admin Portal?
1. Connect to the Piso WiFi Router
Connect your device (phone, laptop or PC) to the Piso WiFi network.
2. Open a Web Browser
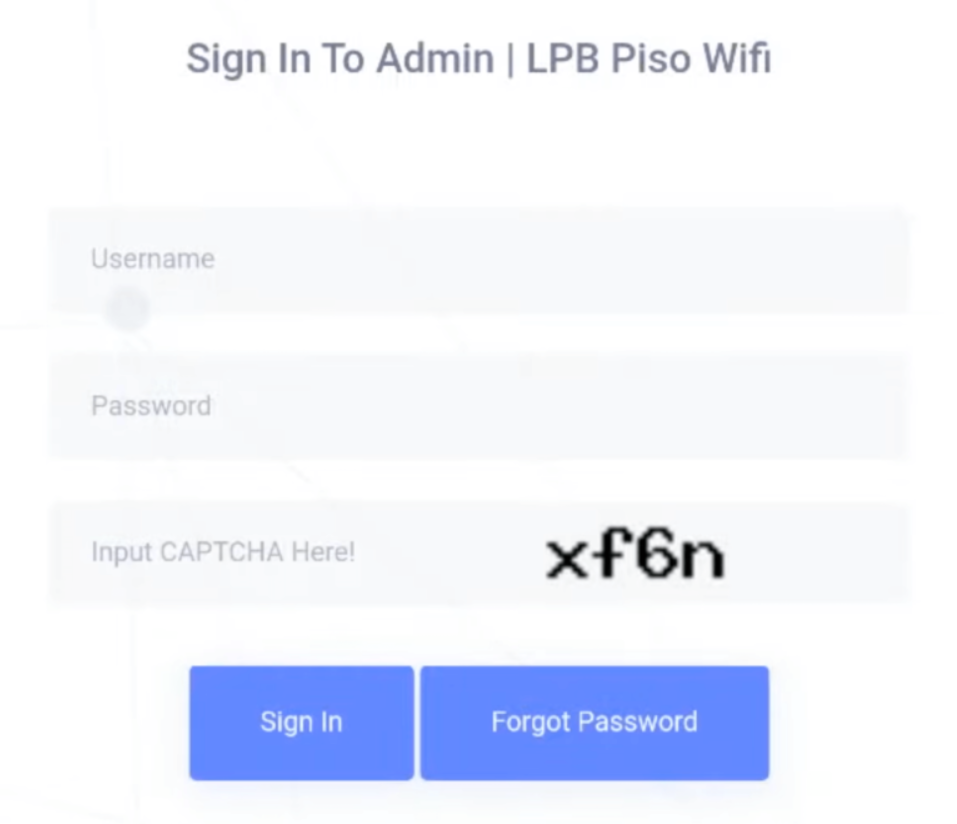
Open Google Chrome, Firefox, or any browser and type 10.0.0.1/admin in the browser’s address bar.
3. Enter Admin Username & Password
Enter admin as the default Username and 123456789 as the default Password. Click the sign in button and you will be logged in to the LPB Piso Wifi Admin Dashboard.
Admin Dashboard Features:
- View active users
- Set rates and time limits
- Control bandwidth
- Generate voucher codes
- Block Spam Users
- Customize pause/resume settings
- Check usage logs
- Add your shop name or redirect page
- Change admin password for security
- View Sales report, Total sales etc
How to use Voucher Generator?
1. Firstly Login to the Admin Dashboard
2. Go to Voucher Generator page on the dashboard menu.
3. Click Generate Voucher option on that page.
4. On the respective field enter the Price, Minutes and Voucher Validity, Data Capping, Download and Upload Speed and click Generate.
5. After that the system will automatically generate vouchers.
How to Add Timer Rates?
1. Firstly Login to the Admin Dashboard
2. Go to the Timer Rates from the dashboard menu.
2. Go to the Timer Rates from the dashboard menu.
4. On the respective field enter the Number of Pesos, Minutes/Hours/Days and optionally Expiry Date. For example, 20 pesos will be valid for 4 hour 0 minute 0 seconds.
5. Click on the add button to save this.
How to set Wi-Fi Speed Limit?
1. Firstly Login to the Admin Dashboard
2. Go to the Network from the dashboard menu.
3. Click Speed Limiter option on that page.
4. You will see Global Speed Limiter and Default Per User Speed Limiter. Set them for Upload and Download speed.
5. The Built-in Port prioritization is automatic by default and you can set TCP/UDP from High to Low for each tasks.
6. Click on the Save Changes button to save this.